
Loft Ventilation UK: Why Condensation Happens and How to Stop It
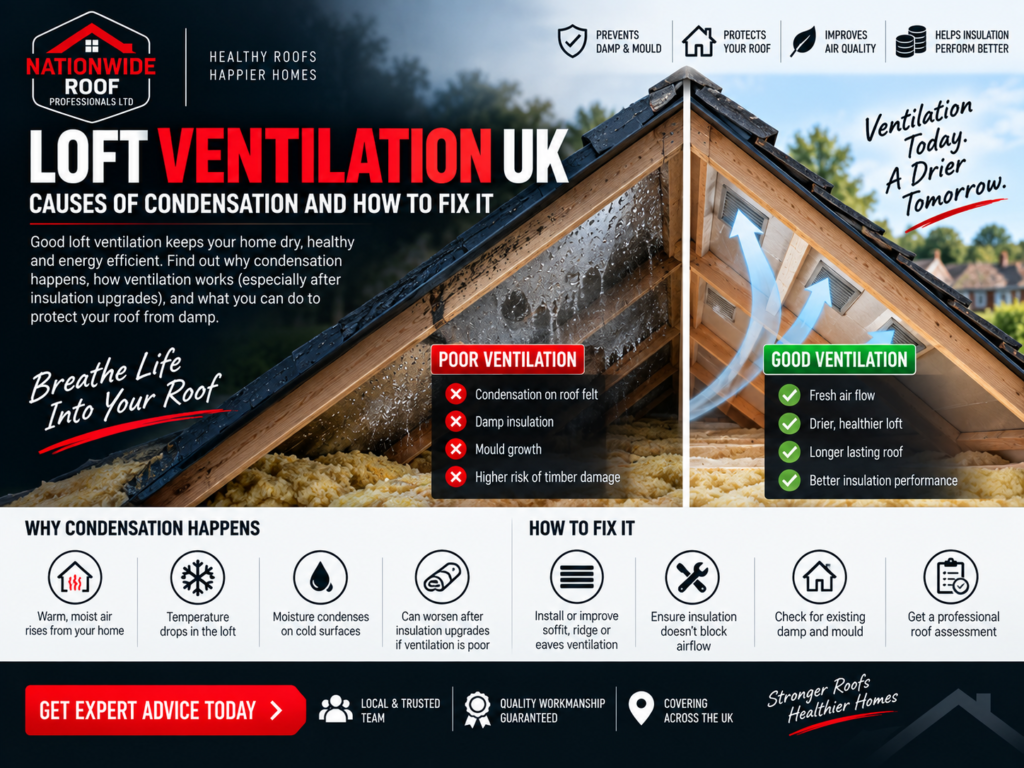
Quick answer: Loft condensation happens when warm, moist air from the home rises into a cold, poorly ventilated loft and condenses on the underside of the roof. Signs include black mould on timber, damp insulation, and musty smells. Fixing it means clearing blocked eaves vents, fitting vented soffits or ridge vents, and reducing moisture sources inside the home. A loft that feels warmer after new insulation is doing exactly what it should. A loft that starts showing damp patches, black mould on the underside of the roof, or a musty smell after the same upgrade is showing a sign that ventilation was not properly considered alongside it. Insulation and ventilation are two sides of the same system, and getting the balance wrong is one of the most common, and most avoidable, causes of roof damage in UK homes. This guide explains how loft ventilation works, why condensation happens, and what to check if your loft is showing signs of a problem. Why Lofts Need Ventilation in the First Place Warm, moist air constantly rises through a home from cooking, bathing, drying clothes, and simply breathing. In an unheated loft space above a heated home, this moisture laden air will eventually find its way upward, either through gaps around the loft hatch, service penetrations for pipes and wiring, or gradually through the ceiling itself. Once that warm, humid air reaches the cold underside of the roof covering, particularly during winter when the roof surface temperature can be well below the temperature of the air inside the loft, it condenses into liquid water, in exactly the same way condensation forms on a cold window. Ventilation exists to allow this moist air to escape before it reaches that cold surface, replacing it with drier outside air that carries less moisture to begin with. How Condensation Damages a Roof Unlike a leak, which usually shows up quickly and in one obvious location, condensation builds gradually and often affects a wide area of the roof space at once. Water droplets forming on the underside of roofing felt or sarking board drip onto insulation below, reducing its effectiveness while wet, and onto structural timbers, where sustained moisture eventually leads to rot. Because condensation typically happens overnight and evaporates somewhat during the day, it can go unnoticed for a long time compared with an active leak, which is part of why it causes so much damage before homeowners realise there is a problem. By the time black mould is visible on rafters or felt, moisture has usually been present for months or even years. Signs of a Loft Ventilation Problem Black Mould on the Underside of the Roof Dark staining or mould growth on roofing felt, sarking boards, or exposed timber is one of the clearest signs that condensation has been forming regularly. Damp or Compressed Insulation Insulation that feels damp to the touch, or has visibly compressed and lost its loft, has likely absorbed condensation moisture, which reduces its thermal performance considerably even after it dries out. A Musty Smell When Opening the Loft Hatch A persistent musty odour, distinct from the normal dusty smell of an unused loft, often indicates ongoing moisture and early mould growth somewhere in the space. Water Droplets on Nails or Metal Fixings Metal conducts and loses heat faster than surrounding materials, so nail heads and metal brackets in the loft are often the first place condensation becomes visible, appearing as small droplets or a fine layer of moisture on cold mornings. Frost on the Inside of the Roof in Winter In particularly cold weather, condensation can freeze before it drips, forming a fine layer of frost on the underside of the roof covering, which then melts and drips as temperatures rise during the day. Why Condensation Often Appears After Insulation Upgrades Adding insulation to a loft floor is one of the most effective ways to reduce heat loss from a home, but it also changes the loft’s thermal behaviour. Before insulation, some heat naturally rose from the living space into the loft, keeping the roof space slightly warmer and reducing the temperature difference that drives condensation. Once the loft floor is well insulated, less heat escapes upward, which means the loft itself runs colder, closer to the outside temperature. If ventilation was already marginal, this drop in loft temperature is often enough to push the space into a range where any moisture reaching it condenses far more readily than before. This is precisely why building regulations require adequate cross ventilation whenever loft insulation is upgraded, rather than treating insulation as an isolated job. Spray foam insulation applied directly to the underside of the roof covering, rather than at ceiling level, creates a different but related problem, since it can trap moisture against the roof timbers themselves rather than allowing it to pass through and be ventilated away. This is one of the key issues we cover in our spray foam removal blog. How Loft Ventilation Actually Works Ventilation in a typical pitched roof relies on a continuous path for air to enter at the eaves, the lowest point of the roof, and exit at or near the ridge, the highest point. This creates a gentle, constant flow of outside air through the roof void, carrying moisture out before it has a chance to condense on cold surfaces. Eaves ventilation is usually provided through vented soffit boards or specific eaves ventilation strips fitted beneath the roofing felt. Ridge ventilation can be provided through a vented ridge tile system, or through tile vents fitted a short distance below the ridge on both sides of the roof. For this system to work, the airflow path itself must remain unobstructed. A common and easily overlooked problem is insulation pushed too far into the eaves, physically blocking the gap that ventilation air is supposed to pass through, even when vented soffits are correctly fitted. Checking and Improving Loft Ventilation Clear Blocked Eaves If loft insulation has been pushed right up against the roof edge,
Cavity Wall Insulation UK: How It Works and the Signs Your Home Needs It
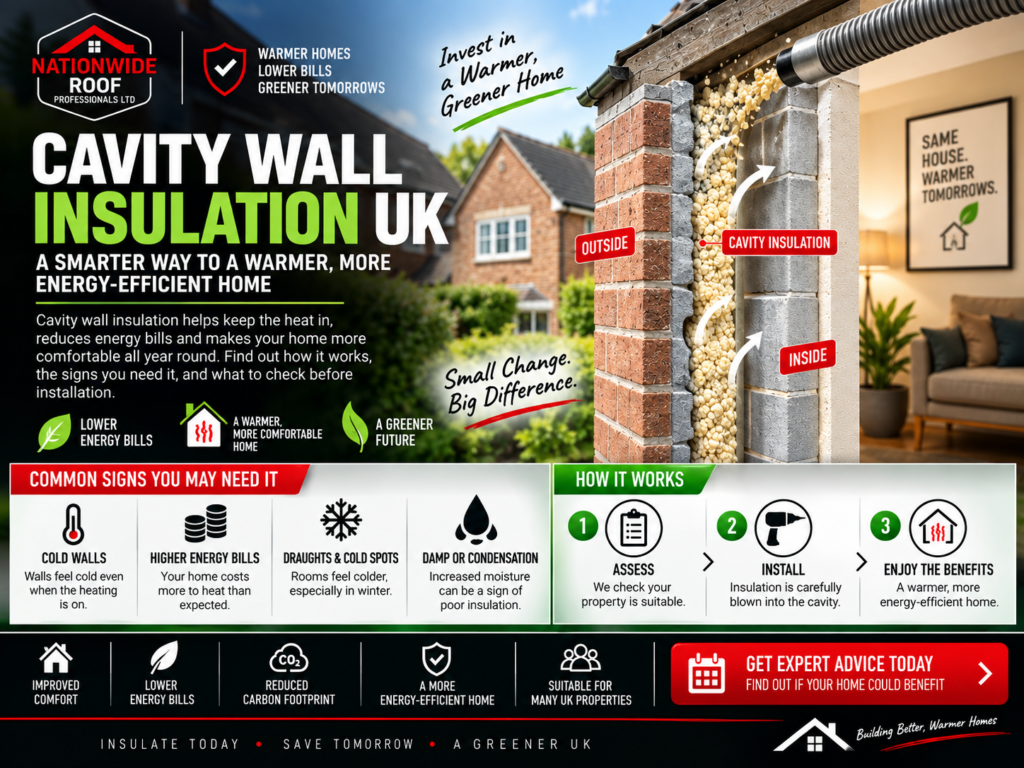
Quick answer: Cavity wall insulation fills the gap between the two layers of an external wall with material such as mineral wool, EPS beads, or foam, cutting heat loss through the walls. Signs you need it include cold internal walls and high heating bills, while damp patches or mould after existing insulation was installed can signal a failed or unsuitable installation. Most UK homes built after the 1920s have a cavity wall, a gap between the inner and outer layer of brickwork, originally designed to stop rain penetrating through to the inside. That same gap, left unfilled, is also one of the biggest sources of heat loss in an ordinary home. Cavity wall insulation closes that gap with insulating material, and for the right property, it is one of the most effective single upgrades available for reducing heat loss through the walls. This guide covers how cavity wall insulation works, how to know if your home is suitable, and the warning signs that existing insulation may have failed. What Is Cavity Wall Insulation? A cavity wall is built as two separate leaves of brickwork or blockwork with a gap between them, usually fifty to seventy five millimetres wide. The gap was originally left empty, relying on the air space itself to prevent moisture crossing from the outer wall to the inner one. Cavity wall insulation fills that empty gap with an insulating material, most commonly mineral wool, expanded polystyrene beads, or polyurethane foam. Once installed, the material significantly reduces the rate at which heat passes from the warm inside of the home through the wall to the cold outside air, without affecting the wall’s ability to keep rain out. How Cavity Wall Insulation Is Installed Installation typically involves drilling a pattern of small holes, roughly twenty five millimetres in diameter, into the outer wall at set intervals. The insulating material is then blown or injected into the cavity through these holes under controlled pressure, filling the gap evenly across the entire wall. Once the cavity is fully filled, the holes are sealed with matching mortar, and in most cases the repair is barely visible once weathered in. The process for a typical semi detached property is usually completed within a single day, with no need to move out or clear rooms, since all the work happens from the outside of the property. Is Your Home Suitable for Cavity Wall Insulation? Not every property is a good candidate, and installing insulation in an unsuitable wall can cause more problems than it solves. Before recommending cavity wall insulation, a proper survey should check for the following: Wall Construction The property needs a genuine cavity wall, not solid brick construction. Homes built before around 1920 are more likely to have solid walls, which require a different insulation approach entirely, such as internal or external wall insulation rather than cavity fill. Cavity Width Building regulations set a minimum cavity width for insulation to be installed safely, since a cavity that is too narrow does not allow adequate clearance between the insulating material and the outer wall, which can increase the risk of moisture bridging across to the inner leaf. Exposure to Wind Driven Rain Properties in particularly exposed locations, such as coastal areas or elevated sites with little shelter, face a higher risk of wind driven rain penetrating the outer wall. In highly exposed conditions, some insulation types are not recommended, and a site specific assessment should determine the safest material and approach. Existing Wall Condition Cracked render, damaged pointing, or existing damp issues should be addressed before insulation is installed, since filling a cavity does not fix an underlying moisture problem and can, in some cases, make it more noticeable by trapping existing damp closer to the inner wall. A reputable installer will always survey the property first and explain clearly if cavity wall insulation is not suitable, rather than proceeding regardless. Signs You Would Benefit From Cavity Wall Insulation If your home has an unfilled cavity, common signs that the walls are losing significant heat include cold spots on internal walls even when the heating has been running for some time, higher than expected heating bills relative to similar sized homes, and rooms that struggle to hold heat once the heating switches off. A simple way to check is to feel an external facing wall from the inside during cold weather. A noticeably cold wall surface, compared with an internal partition wall in the same room, often points to poor insulation in that external wall. Signs Existing Cavity Wall Insulation May Have Failed Cavity wall insulation is generally a long lasting measure, but problems can occur, particularly with older installations using techniques that have since been improved, or where the property was not properly assessed before installation. Damp Patches on Internal Walls If damp patches appear on internal walls, particularly after heavy rain, this can indicate that moisture is bridging across the cavity, either because the insulation material has settled unevenly, the property was unsuitable from the start, or the outer wall has since developed cracks that allow more water through than the insulation can safely handle. Mould Growth in Corners or Near External Walls Persistent mould in corners of rooms with an external wall, especially where furniture blocks airflow against that wall, can point to a combination of poor ventilation and reduced wall temperature, sometimes linked to cavity insulation that has settled or slumped within the wall, leaving gaps at the top. A Noticeable Cold Draught Despite Insulation If a wall known to have cavity insulation still feels cold or draughty, this can indicate partial fill, where the material has not fully covered the cavity, commonly due to obstructions within the wall during the original installation that were not properly worked around. Blistering or Peeling External Render In rare cases, moisture trapped within a poorly performing cavity can show up as blistering paint or render on the outside of the property, indicating that water is not draining or evaporating as
Loft Insulation After Spray Foam Removal: SuperFoil, EcoWool and Cavity Wall Explained
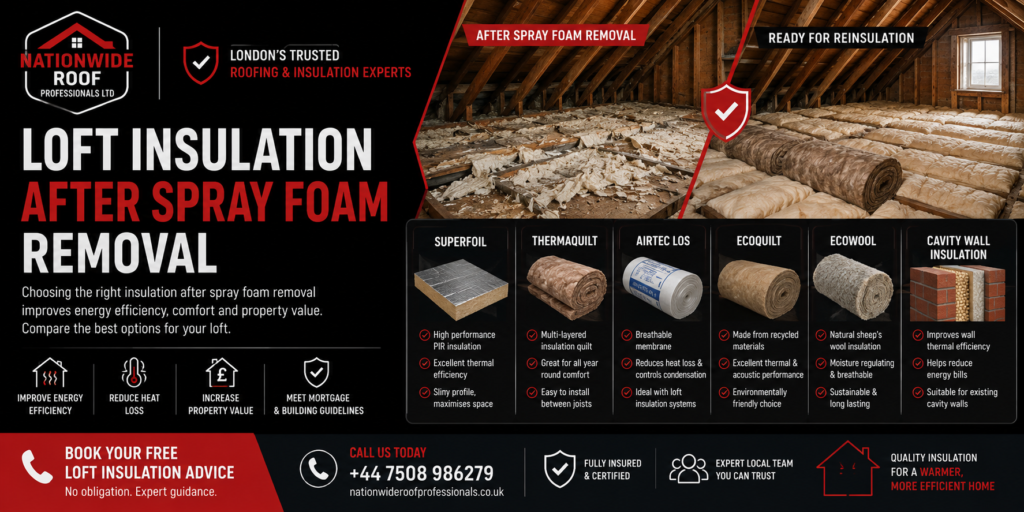
Loft Insulation After Spray Foam Removal: SuperFoil, EcoWool and Cavity Wall Explained Once spray foam has been professionally removed from a roof, many homeowners are left with a bare, cold loft space and a decision they were not expecting to make. The foam that caused the original problem was, in most cases, installed to solve a genuine issue, poor energy efficiency and high heating bills, so leaving the loft uninsulated is rarely the right long term answer. The good news is that modern insulation options give you the same energy efficiency benefits spray foam promised, without blocking the ventilation a roof space needs. This guide walks through the main options we install after a removal job, including SuperFoil, ThermaQuilt, AirTec LOS, EcoQuilt, EcoWool and cavity wall insulation, so you can choose the right fit for your property and budget. If you are still at the stage of confirming what type of foam you have and what removal will involve, our earlier guides on identifying open cell and closed cell spray foam and what to expect during spray foam removal cover that ground in detail. This guide picks up where those leave off, once the roof space is cleared and ready for new insulation. Why Reinsulating Matters After Removal A newly cleared loft space, while safer for the roof timbers, offers no thermal protection at all, meaning heating bills can actually rise in the short term if the space is left as it is. Beyond cost, an uninsulated loft also increases the risk of condensation forming on the underside of the roof covering during colder months, since warm, moist air from the house below can rise unchecked into the cold roof space. Choosing the right replacement insulation is also an opportunity to correct the ventilation mistake that likely contributed to problems with the original spray foam. Every option below is designed to work with a properly ventilated roof space rather than sealing it, which is the fundamental difference between these products and the foam that was removed. SuperFoil Insulation SuperFoil is a multi layer reflective insulation, combining foil layers with a foam core to reflect radiant heat back into the living space while still allowing the roof timbers to breathe. It is a popular choice for lofts with limited headroom, since it achieves strong thermal performance in a relatively thin layer compared to bulkier alternatives. Installation involves fixing the foil layers between or over the rafters, with a small air gap maintained on either side to allow the reflective properties to work effectively. It is a good option for loft conversions or rooms in the roof, where maximising usable headroom is a priority alongside thermal performance. ThermaQuilt Insulation ThermaQuilt is a flexible quilted insulation designed for straightforward installation across loft floors or between rafters. It combines good thermal performance with sound insulation benefits, making it a popular choice for homeowners who also want to reduce noise transfer between a loft conversion and the rooms below. Because it is supplied in rolled quilt form, ThermaQuilt is relatively quick to fit across large, open loft areas, which can help keep labour costs down compared to more specialist products. It performs well as a straightforward, reliable replacement for homeowners who simply want a properly insulated, ventilated loft floor after foam removal. AirTec LOS Insulation AirTec LOS is designed specifically to maintain a clear air gap alongside the insulation layer, directly addressing the ventilation problems that spray foam is most commonly criticised for. This makes it a particularly well suited option for properties where a survey previously flagged ventilation concerns, since the product is engineered around maintaining airflow rather than treating it as an afterthought. This type of insulation is often specified where a roof has previously suffered from condensation or damp related issues, giving homeowners confidence that the same problem is far less likely to recur once the new insulation is fitted correctly. EcoQuilt and EcoWool Insulation EcoQuilt and EcoWool are both softer, more traditional insulation materials, with EcoWool in particular offering a natural fibre option for homeowners who prefer a more environmentally conscious material. Both are effective at loft floor level, sitting between and over the joists to reduce heat loss through the ceiling below while leaving the roof space itself properly ventilated above. These options tend to suit homeowners who are insulating at ceiling joist level rather than converting the loft into usable space, since they are less suited to rafter level installation in rooms with a finished, habitable roof space. They remain among the most cost effective insulation choices for a straightforward, unconverted loft. Cavity Wall Insulation While not a direct like for like replacement for roof level spray foam, many homeowners take the opportunity of a loft insulation upgrade to also review whether their external walls are insulated. Cavity wall insulation fills the gap between the inner and outer leaf of a cavity wall with insulating material, reducing heat loss through the walls in the same way loft insulation reduces heat loss through the roof. Combining a fresh loft insulation upgrade with cavity wall insulation, where suitable for the property’s construction, often delivers a more noticeable overall improvement in comfort and heating costs than addressing the loft alone, since walls typically account for a significant proportion of total heat loss in an uninsulated property. Comparing the Main Options Product Best Suited To Key Benefit SuperFoil Low headroom lofts, loft conversions Strong thermal performance in a thin layer ThermaQuilt Large open loft floors Quick installation, added sound insulation AirTec LOS Roofs with previous ventilation or damp issues Maintains a dedicated air gap EcoWool Unconverted lofts, natural material preference Effective, environmentally conscious fibre EcoQuilt Unconverted lofts, straightforward budgets Cost effective floor level performance Cavity Wall Insulation Properties with unfilled cavity walls Reduces heat loss through external walls How to Choose the Right Option for Your Property The right choice depends on whether your loft is used purely for storage or has been converted into habitable space, how much headroom you have